Showing posts with label Great War. Show all posts

Sunday, 30 August 2020

Making the August Deadline

Over a month since the last blog post! Not that nothing has been happening. NZ went into Level 2 (Level 3 in Auckland) and shit just all got very weird again. Honestly, I can imagine that the see-sawing of alert levels is playing serious games with everyone's mental health, not just mine, but I found I went into survival mode where I've worked my arse off and then crashed. Having been feeling very on top of things I'm now struggling for the energy to concentrate. Surprisingly, in the last week I seem to have regained my painting mojo while my energy levels sagged, and I think it is because painting is my zen release. Now I have prelim exams to mark and that is seriously impinging on my desire to paint. Therefore, in a way to avoid the guilt of painting when I should be marking, I've decided to do neither and write a long overdue blogpost.

So here is the painting I haven't displayed so far, starting with my work for Infamy Infamy.
4 groups of British warriors for Infamy Infamy. Nobles to the fore.

Skirmishers, painted using the magic of contrast paint, and my Barbarian leader and a musician.

The British army so far. I have another couple of infantry groups, another skirmishers, cavalry, chariots and naked crazies to go.

The Romans so far. Three groups of legionaries, Centurion, Optio and musician, as well as a scorpio. Numidians, slingers and Caetrati still to come.

Alongside my Infamy Infamy I have been steadily painting for Craig as well. Here are Taun Tauns and Rebel Veterans:

Close up of these guys.

And Craig's Wookies, painted the same way as my own using Sorastro's wet-blending advice

My birthday came and went, and with it some inevitable toy soldier acquisitions. There has been a small amount of painting on these new additions to the collection. 
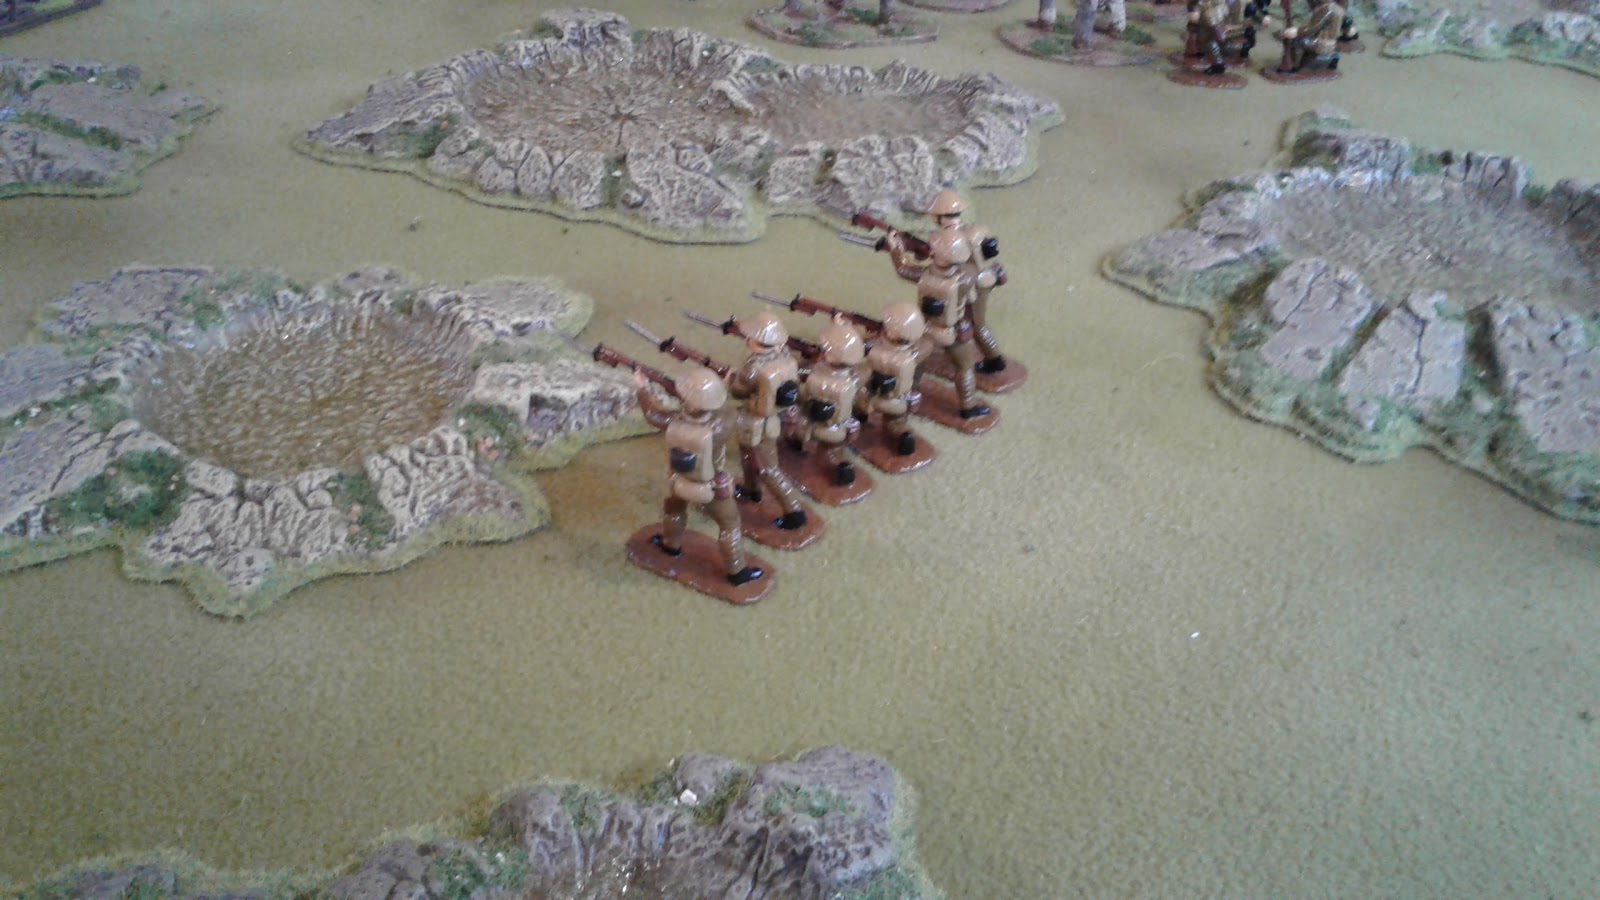
The first of 5 French squads for Trench Hammer in my 54mm WWI project:
A VB rifle grenade team.

The other present was my long overdue descent into the world of Marvel Crisis Protocol. 
Iron Man 

Spiderman

The bases will all be painted when I've finished everyone so that they all match perfectly. I also plan to make sure that my city terrain matches as well. 

The aim for the near future is to get all of the Infamy Infamy figures painted and to get a few games under my belt. Simultaneously I want to finish Craig's Star Wars which is a single unit of rebel pathfinders before moving o nto painting his Wild West Exodus figures. By next weekend hopefully I'll have a some breathing room to play a game of something.

Nate

Saturday, 16 May 2020

Church build continued

Further progress on the Spanish church, and the tall slim building for the town.
From the front

And the back
You might notice in the background is one of my completed buildings. I've been making sure that they can fit together with the new buildings in a town. To the right of this picture is the tavern, the bare bones of which are finished, but I've run out of tiling sheets, so it is a few steps behind.

The black on the church is not because it caught fire. I spray painted the interior of the tower and the windows black, as I won't be able to get a brush into those places.
After taking this photo I went back to the roof on the church tower and tried tidying it up.  It's definitely been the most challenging part of the build so far.
 Also on today's terrain building list was wallpapering my ruined 1/32 WWI house. I went online and found some Victorian wallpaper designs and chose one, which I then copy and pasted into publisher, making a full sheet of the pattern and printed it off.
You can see a few British Tommies in what remains of the structure. Three units of 6 figures can probably occupy this position. I will probably make a second one sometime in the future.

Craig's next box of toys to be painted arrived today, and I need to hurry up and get his Successors finished, so I'll try and finish the church and house tomorrow.

Nate

Saturday, 28 March 2020

War at Sea during the lockdown

This is the third day of the New Zealand lockdown, and the first day of the school holidays, so I was able to do a little gaming stuff today. I decided to repaint my sea boards, as they were looking a bit worn, and decided to christen them with a small game of One Hour Jutland. These rules are written by Martin Rapier and John Armatys, and available free from Martin's blog. I've had one game where I took the full mini-Jutland forces, but this time I just wanted to have a quick game so used some light forces.
The British squadron

The German opposition
 Ignore the ships used - both sides had a battle-cruiser, a light cruiser and one or two destroyers. I thought Westfalen was a battle-cruiser, but I should have been using Von der Tann. And the Brits should have had Indefatigable on the table. I didn't have my guidebook handy.
The British navy have the best of the duel
 The two sides advanced into range to broadside each other, with the destroyers letting go a couple of torpedos as well. The British gunnery proved far more effective than the Germans, despite the Germans almost getting a critical hit on the British Battlecruiser (they explode on a natural 6 followed by a second roll of 5 or 6 - the Germans rolled a 4).
The German Battle-cruiser is in trouble

Ka Boom! Scratch one German ship.

The Wiesbaden makes a run for it.
I enjoy solo gaming, and as such this lock-down is fine for me. I'm planning on trying to play plenty of games in between painting my daughter's bedroom, but mostly relatively quick ones like this. 
The boards from above look quite effective.

Nate

Saturday, 14 March 2020

I wanna be... your Trench Hammer!

Having a read a couple of battle reports on the Stronghold Rebuilt the idea of using the Trench Hammer rules by Nordic Weasel looked absolutely perfect for my 54mm Great War project.
So with my recently completed armies all glossy and shiny I decided to play out an assault by a British platoon on the German line, using the textbook assault tactics of the British army of 1917-18.

First turn to the British and the Lewis section and rifle bomber section provide support as the Bombing section and rifle section advance.

It is probably not a good thing that they are standing out in the open, but remember, I've never used these rules before.

The German line consists of an HMG, rifle gruppe and MG08/15 gruppe

On the side of the table I have the printed cards to keep track of each unit. These were kindly provided by Jozi's tin men blog and are free to download. The QRS is mine and incorporates the integrity checks outlined in the Trench Hammer expansion pack.

Oh dear. Being in the open is slightly dangerous it would seem!

The bombing section hurriedly enters the cover of the woods on the right flank

And the support sections occupy some shellholes very quickly.

The HMG is receiving fire from the rifle grenades, and ineffectively returning fire.

In the right the bombing squad continues to advance, winning the first firefight with the Germans in front of them.

Followed by an assault that successfully occupies the German line.

It would appear the British are on the verge of victory!
Achtung! The rifle gruppe counterattacks and drives the British out!

And the HMG takes care of the rest.

'Zat vas a close vun!'

'That's it boys! Hunker down and wait for reinforcements!'

So that was the first game. With 50% casualties the British called off the assault and the Germans held their trench. I learned a few things from the game. Damage can be horrific - it is a d6 roll and your nice fresh unit can  find itself on the verge of destruction very quickly. This is exactly what happened to the British Rifle section. A difference from the main rules is that I don't allow units to be destroyed until they have failed an integrity check, but they are not allowed to carry out any orders other than rally once they reach 6 casualties. This little bit of house-ruling was never really put to the test, as every unit suffering 6 casualties or more failed their integrity check.

It was a good little game and perfect for my small collection of 54mm toy soldiers. I now just need to devise some more scenarios to include the artillery, and I am now eyeing up a 1/32 tank, just because.

Nate

Tuesday, 25 February 2020

The guns! The guns!

A momentary departure from Star Wars Legion today. Last night I painted two field pieces for my 54mm Great War project. Here they are suitably gloss varnished, but in quite a bit of shadow due to the sunny nature of the day.
Emhar German artillery

Emhar British artillery - you only get 3 crew in each pack.

Comparison of the two together

A slightly angled shot so you can see the kneeling crewman a bit more clearly

And in this case you can see the front of the 18 pdr
Emhar 1/35 are quite a bit smaller than the Armies in Plastic figures, but I guess that is all part of the retro style of game that the Great War project will have. I've invested in the Trench Hammer rules, and they look perfect for what I want to accomplish, so I might leave behind my 54mm Great War rules for now.
I have 24 infantry left to paint, and I plan to get into them as soon as the Star Wars Legion is complete. I also think that I will invest in a tank for the British, and if anybody knows of a good place to get 54mm mortars with crews that are unpainted and don't cost the earth, please let me know.

Nate

Saturday, 9 November 2019

Hoogh's Farm

In memory of the late Stuart Asquith I decided to bring out the toy soldiers for a replay of the 'Hook's Farm' scenario from HG Wells' book Little Wars. This was a scenario that Stuart apparently played many times, and in accordance with his love of simple rules and 54mm glossy toys, I set it up for a Great War game.
The assault on Hoogh's Farm.
Unfortunately I only have two units a side painted, so there is one unpainted British unit in this game. I also played with the set-up a little. A German HMG was hunkered down in Hoogh's Farm, while to the east a small force of 5 Germans held Faerphlaae Church. Two German units of 8 figures each were placed on the table edge to help counterattack against the British assault.
The British force consisted of 3 units, each of 10 infantry.
The battlefield. Hoogh's farm to the left, Faerphlaae Church to the right. Notice I'm using what kid's blocks I could find for the ruined buildings.
Each turn a British shell would fall on a unit to represent creeping barrage.

Faerphlaae Church seen from the British trencehs.
The German garrison awaits the attack.

The British started by getting out of their trenches and advancing. Immediately they came under fire from the garrisons in the buildings.
The British on the left leave their trenches.
The maxim gun opens up
Casualties are suffered - but morale stays strong!
The exact same story on the right.
The Germans had begun to move up for the counterattack as well.
Using move and fire, the Tommies advance. Luckily the German counterattack is pinned by the barrage.
Around Hoogh's Farm the Germans are moving up
Surging forward the British infantry take a toll of the Germans, but they are unable to assault the Church.
The German HMG is pinned and the middle unit starts hitting the counterattacking German infantry in the flank.
Carnage around the Church - The German counterattackers are pinned, but the Brits stay strong.
The German HMG is unable to rally and is knocked out in the next turn.
The Faerphlaae Church garrison have defeated the attack, but at huge cost.
Only 3 men are left standing, and they are pinned - unable to move or fire.
Leaving the centre force free to flank the Germans around the farm and wipe them out.
The battle ends with the triumphant occupation of Hoogh's Farm. 
The simple one page of rules I have stood up extremely well - except for one problem. I hadn't thought about how to deal with the HMG. The morale rules as written don't really work, and to have it wiped out by 2 hits would make it of very limited value indeed. So I devised rules for crewed weapons. Not just HMGs but mortas and field guns for when (if) I get them. Essentially no matter how many times an crewed weapon is hit in a turn, it will only ever count one hit and become pinned. All crewed weapons rally on a 3+ on a d6, which means that they are 66% likely to get back to business in the next turn. A second pin means the weapon and the crew are destroyed.

The whole game took an hour. Short, sweet and fun. With more luck the Germans could have done better, but even so they retained one objective while losing the other, so it was a draw. This bodes well for these rules, which, I must say, are extremely simple. I think they capture the flavour of the Great War well though - the high body count would certainly attest to that.

Nate