Sunday 18 November 2018

Secure the Bridge

I managed to get in a small game with all of my painted Spanish Succession units today. Just two infantry and two cavalry units a side, I figured a race to secure a bridge might be a good scenario to play out.
Height of the battle
 The background to games is always important to me, and I like to have a narrative behind the fighting. In this case the Allies are racing north to secure a bridge over the river. The crossing is guarded by a unit of Dragoons, and the Bourbon forces are a step behind the Allies, who snuck out of camp at night.

Forces:
Bourbon (all Spanish)
Mahoney Dragoons
Granada Nuevo Cavalry
Seville 'Old Purples'
Burgos 'Old Blues'

Allies
Zinzendorf Dragoons (Spanish)
Killigrew's Dragoons (English)
Rivers' Foot (English)
St. Amant (Dutch)
Spanish Mahoney Dragoons deploy next to the bridge, while the Allied Zinzendorf arrive on the left of the picture.
 The Spanish decided to cross the bridge and delay the enemy on the far side of the river. (the option was a 50/50 call on a % dice throw). It proved to be an inspired choice.
The Mahoney Dragoons cross the bridge.
 The Allies got reserves on a roll of 3+ in the first turn. The Spanish on a 6. Every turn the number decreased, but if the road was blocked, then the reserves would have to wait until the following turn. Friction would not be the Allied friend in this game.
The British Dragoons arrive, but at the same time as the Granada Nuevo Regiment, just visible in the top left corner.

As the Mahoney dragoons leave the bridge in march column the Zinzendorf dragoons form up, prepared to charge.

But the Spanish get the first move in the next turn, and the dragoons form up just in time to repulse the Allied charge.

Granada Nuevo start to cross the bridge, with the infantry bringing up the rear.

Rivers' regiment of foot starts coming through the woods as the Granada Nuevo arrive. The Mahoney dragoons reform to lose their disordered status.

The Old Purples are crossing the bridge as the Bourbon horse form up. The Zinzendorf dragoons repulse a charge from the Mahoney Dragoons.

Between them the Spanish cavalry units force back the Allied cavalry - the Zinzendorf dragoons breaking and routing.

But the Allies move forward, Killigrew's Dragoons charging into the Mahoney boys and sending them reeling back. Rivers' regiment gets a volley away into the Granada Horse.

The Old Blues make it over the bridge as the Old Purples let loose a volley at the British infantry. Killigrew keeps the pressure up on his opposites.

And the final charge proves too much. The Mahoney dragoons break.

Meanwhile The Granada horse chances its arm and exposes its rear to the St Amant regiment in preparation to flank Rivers' regiment. It is a gamble that pays off.

The Old Blues deploy as Killigrew reforms to face them. The Old Purples and English infantry exchange volleys.

Forced back, Rivers' Regiment is on the verge of breaking.

The Granada horse have taken some flak from the Dutch but are still strong enough to charge the disordered English infantry and deliver the coup de grace.

At the end of the battle Killigrew was lining up a charge against the rear of the Old Purples, but with 2 units lost to 1, the Allies are broken.

The end of the battle from another angle showing all of the remaining combatants.
The game was turned by the actions of the Mahoney dragoons crossing the bridge and taking the battle to Allied side. The woods created a bottleneck that made it incredibly difficult for the Allies to deploy. The Allies also struggled with some poor early command rolls that meant that they could only move half their units at a time. Although they were the only Spanish unit routed, the dragoons did the business, and on a day when O'Mahony paid a blinder for Ireland against the All-Blacks, it is fitting that his namesake lead the most important of the Spanish units in this victory.

The rules held up surprisingly well, There are a couple of little tweaks I need to add - it wasn't written anywhere that march columns count as in 'disorder' and as 'enfiladed' if charged or shot at, so I'll change that, as it was always the intention. The use of percentage dice mean that very unit has a chance to do the business, as when the Zinzendorf dragoons managed one last rally to beat off their opposites before the inevitable.

Oddly, throughout the battle I suffered from 'Raglan syndrome'. I kept referring in my head to the Bourbon troops as the French! The reason, in my case, is probably because there were Spaniards on both sides, and not flashbacks to a past life when I lost an arm fighting the Frenchies... probably...

Nate

Friday 2 November 2018

Playing the game

The rest of the figures for the Great War turned up today, and I quickly put them into units and started playing a game.
A British unit advancing on the German line
 The rules aren't written down. I'm making them up as I go. I start with a 10"move for infantry, firing is 24"long range and 12"short range. A 6 on a d6 will hit at long range, a 5 or 6 at short range. Firing at troops in cover is -1 to the die roll.

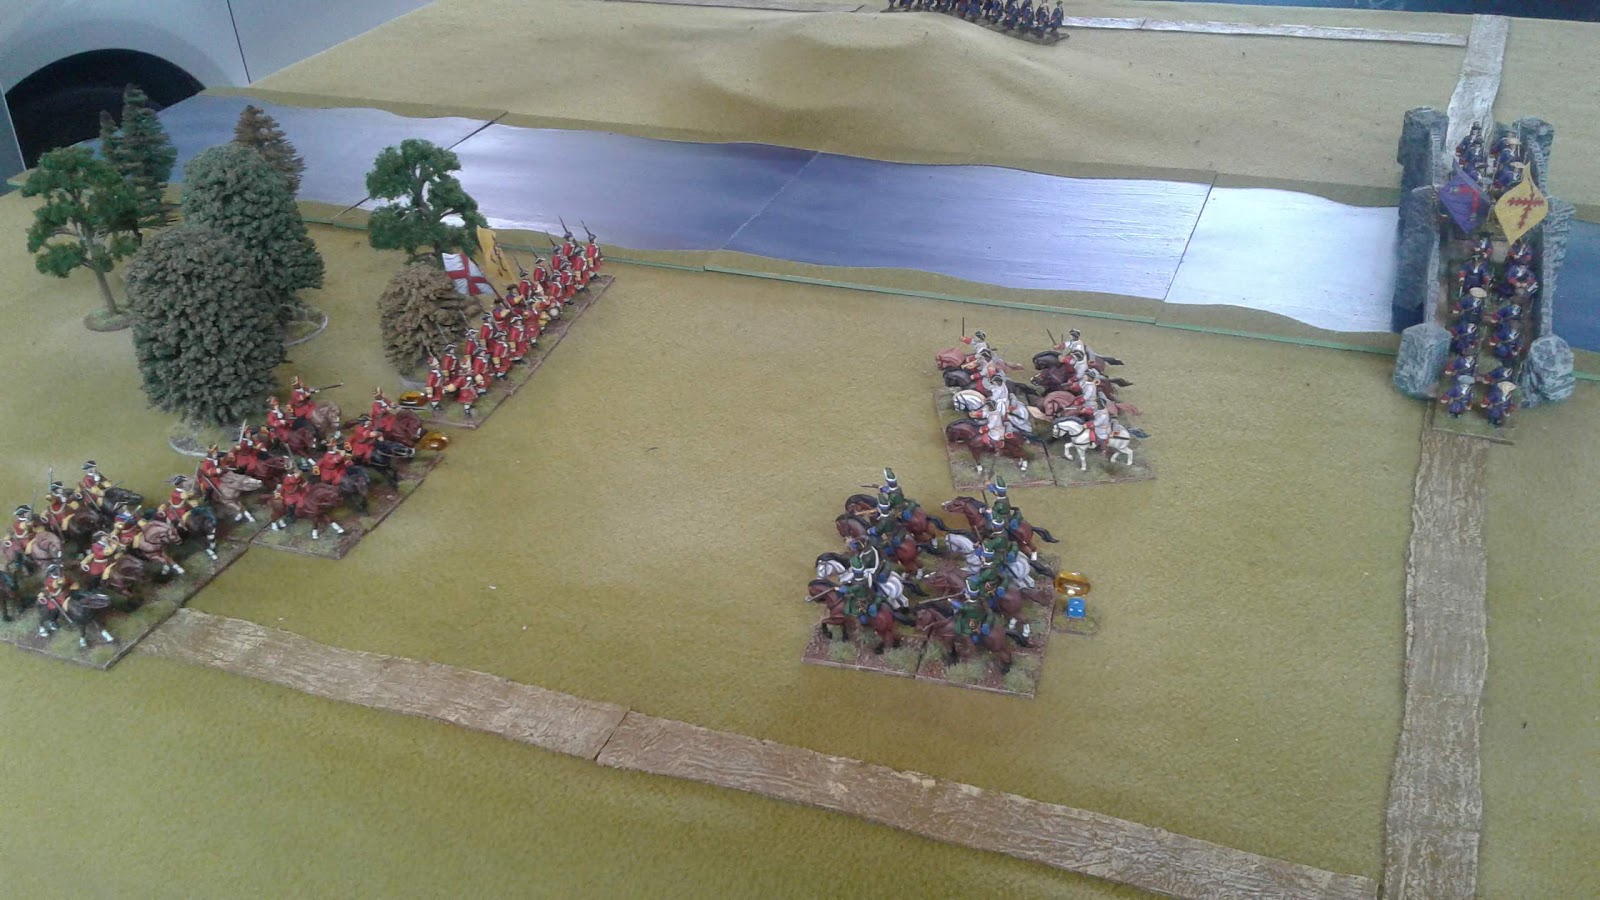
The table laid out. 4 units of British troops assault lines held by 2 and a half units of Germans 
 Troops can either move or fire. LMGs fire with 3d6.
Preparing to advance on the left flank.
 First problem - how much does difficult terrain reduce movement by? I figure a good way to deal with this is to randomise the movement. I choose to roll 2 average dice to determine movement through terrain. This means a result of between 4"and 10".
The centre units are taking casualties. The closest unit is protected by the terrain.
 After a couple of turns I come to the conclusion that all movement should be randomised. From now on every unit that moves will move 2dAv".

Units leaving dead behind.
 Units are starting to take casualties. Now I need to think about how they will react. I decide that every time a unit takes a casualty it must test to continue. If it fails it is pinned. As it has gone to ground it is -1 to hit, but it can't advance. It also treats all targets as long range and can only hit on 6s at both short range and in hand to hand. The test is rolled on a d10. The required score must equal or be lower than the number of men left in the unit. An officer adds an extra +1 to the unit total.
The test is taken immediately after the firing phase of the enemy. At the beginning of the unit's own turn it may test again to try to unpin.
Less than 50% of the unit makes it past the barbed wire. Time for an assault?

The assault on the right is making some headway.
 Now time to think about assaults. I decide that a d6 is rolled for every figure involved, including officers (they can't shoot). The attacker rolls first. Any hits remove an enemy. Once the attacker's have had their turn and enemy casualties are removed, the opponent can fight back with whatever they have left. The side with the fewest men left must test morale. If they fail, they break and run.
The centre has turned into a bloodbath - too many German troops in defence is the prognosis!
 Running is 2dAv, like movement.
On the right the Allies break into the German trenches after their successful assault.
 On the British left a unit is pinned, unable to rally and then fails a second test from being shot again. The result is to run away.
British left in retreat
 Troops will be able to rally if they can pass a morale test, otherwise they will keep going 2dAv every turn until off the table.
The pity of war...
And that is it. The core of the rules work well. Barbed wire will get some special rules. I'll look  at preliminary bombardments that may pin the enemy and remove entanglements. The other thought I had was to allow troops to fire at long range at troops in cover, but they can only force a morale test on the enemy with a 6, not cause casualties. Then there will be some point in fire and movement tactics.

Time to start thinking about writing these up.

Nate

Thursday 1 November 2018

Something shiny this way comes

A few months back I mentioned my fondness for glossy toy soldiers, and my plan to gloss varnish the French-Indian Wars project to try and scratch that particular itch. But the problem with modern figures like those from North Star and Crusader is that the detail screams out for at least some shading, and as such, they do not give a 'true' toy soldier aesthetic, where solid colours abound. I've been following Howard Whitehouse's A Gentlemen's War facebook page, which is dedicated to his AGW rules, but a big part of what happens there is playing with toy soldiers painted to look like such - many of the being from the Irregular Miniatures 42mm ranges.

The thought of investing heavily in 42mm armies is tempting, but beyond my means. And then I thought about it. Which period of history do I love, but have no armies for? Why, the Great War of course! And it just so happens that there are 54mm toy soldiers available for this conflict in the form of the Armies in Plastic range. I have had 10 of these figures floating around for about 13 years now, picked up at the Waiouru Army Museum. So I got out the paintbrush.
First up, the Germans in Stahlhelm.
And from the rear

British infantry led by a plucky officer with a whistle and revolver!
The armies clash!
I'm quite taken with the finished product, and have ordered a couple of boxes from the nice chaps at Regal Toy Soldiers, which will give me another 40 figures for each side. I was tempted to go early war with pickelhauben and soft caps, but then thought that later down the line I might look at a late 19th century imagi-nation version of 54mm fun, and then the picklehauben will indeed be prolific!

Now of course these chaps will need rules to play with, and I'm thinking the simpler the better. I have some ideas in mind, and we'll see where they lead.

In terms of expansion, Emhar make 1/35 artillery and tanks for the Great War. But the conundrum lies with Heavy Machine Guns. Aside from some Britains or King and Country models, most of which are out of production and worth a fortune to buy, I've been unable to find anything for the British. For the Germans the best I could find is to get some second hand Del Prado figures and do some head swaps, but even then, with postage I'll be looking at $50 NZD.
I'm just going to have to make do without HMGs in the meantime, keeping an eye out for second hand deals.

Nate