Showing posts with label One Hour Wargames. Show all posts

Monday, 23 April 2018

A One Hour Wargame with Featherstone style rules

Over the weekend I did some work on tweaking a Donald Featherstone ruleset that appeared in 'Campaigning with the Duke of Wellington and Featherstone'. This is basically the same set that was used in the Peninsular War book he wrote for Argus books in the 1990s and similar to the rules in the recently republished 'Wargaming the American War of Independence'. In the original rules combat is resolved by the target unit rolling percentage dice. 5 hits and the unit was done for, although a d6 roll would decide if it retreated or routed before that point.

In order to make this a bit more simple and intuitive for me, I transformed it from the target rolling percentage dice to the attacker rolling a d10. This required very little tweaking, and on top of it I added some basic command rules and force morale rules. A few clarifications were added, just to remind myself or opponents about fields of fire etc, but the guts of the rules fits on 3 sheets of paper, which I expanded to 4 with a cover, so that I could print it out as a booklet on A4.

Next I altered the rules to fit the American Civil War, which was very simple to do, using some ideas from the rules in 'Featherstone's Complete Wargaming'. So today, having not been balloted for jury duty this morning (phew), I had time to come home and play a quick game.

With the Napoleonics being totally unready for play, I chose the American Civil War collection, and rolled a scenario out of Neil Thomas'One Hour Wargames  (no. 13 - Escape). I then rolled up the makeup of the two rival sides as well. Apologies that some of the units in this game are unpainted - both sides rolled cavalry which are next on the list to paint, and the Union rolled Zouaves, which are also awaiting their turn to be coloured in.

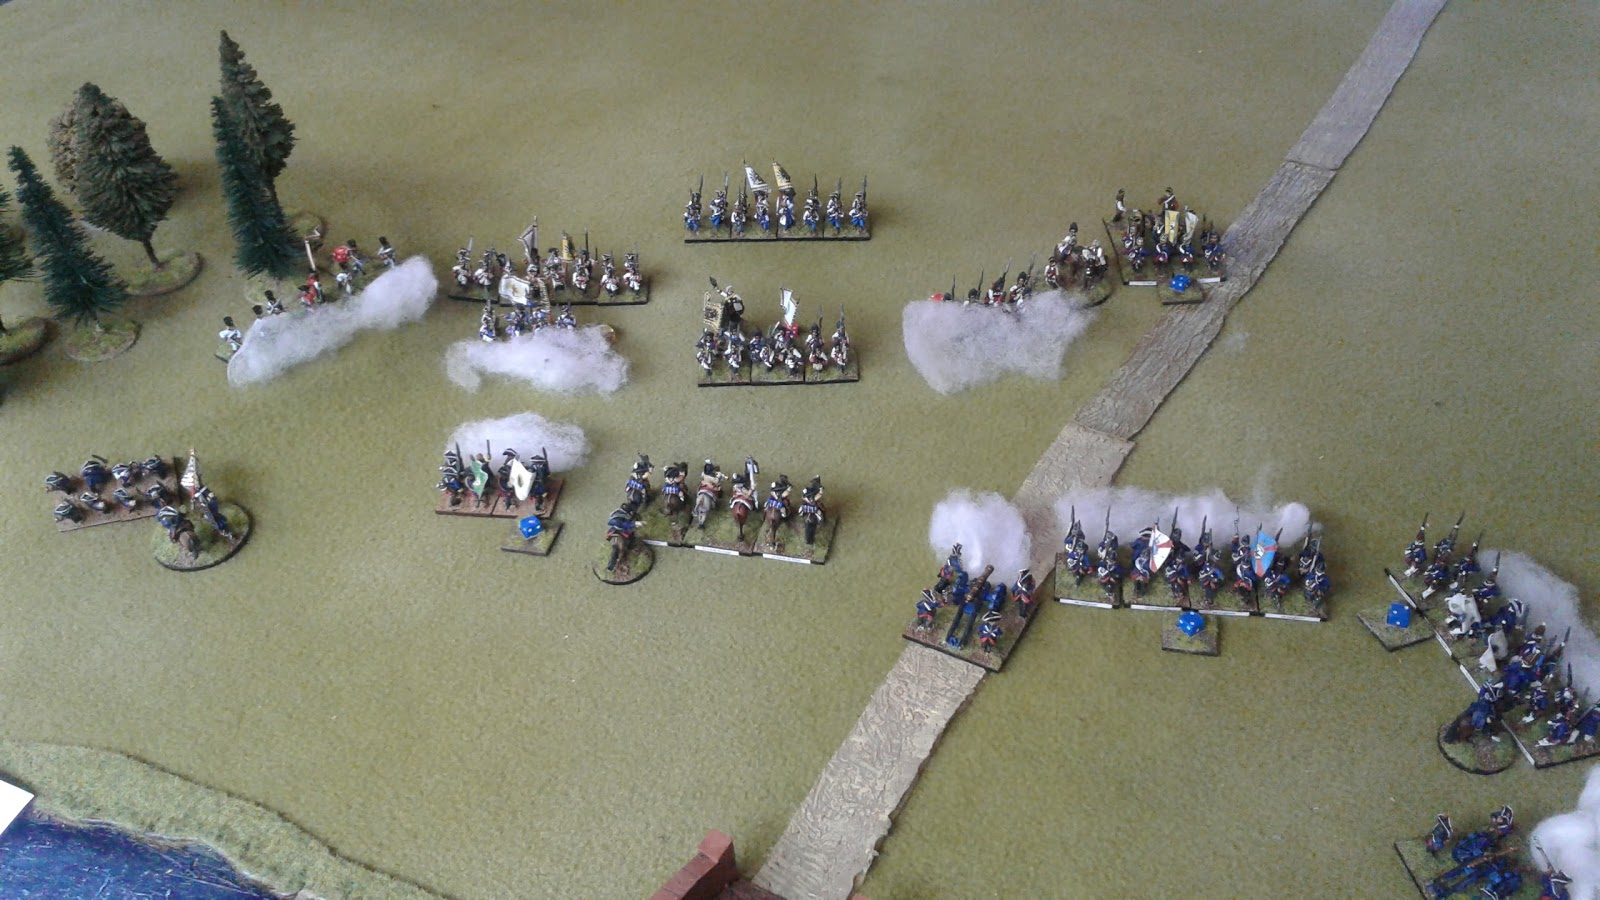
The game starts with one Confederate unit on the board dfending the road (right). The Union has to bust through them and get 3 units off. This photo is in turn two, where units show up on the hill in the left rear. An infantry unit is about to be placed next to the artillery as well. Note the Union cavalry at the top of the picture. They're about to be very important.

In turn 4 The cavalry managed to get around the back of the 4th Texas, who were also charged frontally by the 46th Pennsylvania. Note the top corner where the Indiana Regiment is about to be destroyed. It as their own fault - any sensible unit would have retreated, but they stood in front of the guns, rolling sixes for morale.

In the same turn Confederate reinforcements arrived. The cavalry made a beeline for the Zouaves, who were in column, but didn't quite have the distance to reach. 

The 4th Texas is surrounded and wiped out. The general survives, but beats a hasty retreat.

The Zouaves have time to change formation and launch a volley. The Michigan troops in the woods also open up on the 3rd Texas. Both units roll '1's for morale! With the general over 12"away, they won't rally!

The first two Union regiments leave the board (to the right).

In turn five the last Confederate unit shows up - a battery - and then promptly rolls a 1. The Confederates fail their Brigade morale for having lost over 50%, but the Union was bound to get a third unit off the board within a couple of turns. 
Union victory! Both sides only had one unit each destroyed by enemy action, but the Confederates also lost 2 units to rout, and this was the game winner for the Union. Had the general come on with the reserves (which he could have), he would have been in a much better position to rally his fleeing units.

The rules worked well, even in this small a game. Everything was intuitive, there was very little calculation needed (working out the differential in melee is about as hurtful for the brain as it gets), and the outcomes rewarded sensible tactics, while also reflecting a little bit of luck. By the time the armies are fully painted I'm expecting to have 4-5 brigades a side, so it is good to start small first.

In their current form you can find them here.


Nate

Monday, 13 February 2017

Botched relief in the Crimea

Tonight I was meant to get the brushes out, but wasn't really feeling it. There were a couple of posts I read in the weekend that made me keen to get in a Crimean War game, so I decided that I would choose a scenario and fight one out.
The scenario that I ended up with was #28 Botched Relief, pitting 4 units against 6 units. The only problem was four of the units in the larger force would only activate one at a time because the commanding general was somewhat inept. Meanwhile the 4 units would be determined to attack and capture the town. Forces rolled for and picked I set the board up in the lounge.

General Linguini had been given the role of raiding the small town of Gederovme, near the Black Sea coast. He had two battalions of Sardinians and some supporting Brits in the form of a rifle battalion and the elite 92nd Highlanders, so it was a pretty potent little force. Two battalions of Russians garrisoned the town, and on the hill to the west a relief force was gathered by General Standoffich, consisting of artillery, cavalry and two further infantry units. Standoffich was of the opinion that Gederovme was not worth expending his small army on, but decided that he had better follow his orders, if somewhat unenthusiastically.
General Standoffich arrives on the hill with the relief force.
The town of Gederovme

The Allied force led by General Linguini.
The Allies advance and the first unit of Russian infantry is sent down from the hill. The Rifles turn to face them.
Gederovme firmly in sight the allies begin an advance in echelon.
As they get closer the first casualties are taken and shaken off as General Linguini rallies his men.
The Rifles and the Highlanders hold off the menace to the flank.
The rifles take casualties, bearing the brunt of the Russian attack.
Fire rains down on the Sardinians as they are bounced back from the town.
The Gordons take the lead on the flank.
And in a hail of rifle fire the first Russian unit is broken.
The brave Sardinians charge the town walls again
But one battalion is shattered by the volleys of musketry coming from Gederovme.
The second battalion from the hill charges down into the Highlanders.
Success! The Sardinians push the Russians out of the Eastern part of the village. But can they hold?
While the melee continues to their right the Rifles target the cavalry sitting on the hill.
The Russians are not deterred...
And they push the Gordons back!
Not that it helps them - in the next volley by the Rifles and Gordons combined the Russian battalion ceases to be an effective force.
Meanwhile in the town the two battered Russian battalions open fire on the Sardinians.
A couple of serendipitous sixes and the massed Russian volleys break the Sardinians. The town is completely reoccupied by the Russians.
Facing off against the Russian Hussars the Rifles start to take a battering. The Highlanders renew their advance, determined to capture Gederovme.
Pacing themselves the Gordons poor in volleys of rifle fire ahead of their charge.
And successfully capture the western part of the town.
Having disposed of the Rifles, the Hussars turn towards the town, but are unable to charge a built up area.
The British unleash a volley into the Eastern part of town and the Russians finally abandon it. There is now no Russian presence in Gederovme.
Unable to activate, the artillery watch on as the cavalry, who are unable to charge acknowledge defeat.
I've made some further modifications to the OHW rules for the Crimea to what I have on my Crimean War rules page. The Russians shoot at an additional -1 (for a total of -3) at long range to represent their muskets not being as potent as the opposing rifles at a distance. The general can now rally one hit automatically by being in base to base contact with a unit, rather than rally off d6 hits, as I found this was too many. Rather than removing a base after 4 hits, I've changed it to five and brought unit strength back to the original 15 hits. This means that units lose 2 bases upon 2/3 casualties and this decreases their effectiveness. It means no single bases running around by themselves anymore, which is much more aesthetically pleasing.

The game was bloody with the Allies barely holding on for their victory. I was certain that the Gordons would not be able to resurrect the situation, but they proved their worth. All in all, it came down to the wire and provided a good hour of entertainment.

Nate

Thursday, 22 December 2016

One Hour Jutland

Having finally finished work for the year I have been able to get the paints out again over the past couple of nights. I started the last couple of Seven Years War battalions but then changed tack and thought I'd slap some paint on my 1/3000 WWI ships. I found and downloaded Martin Rapier's WWI Jutland One Hour Wargames variant, and selected the models I'd need to play this, 16 in total.

This morning I laid out my Sea board and started playing out the game:
The battlecruiser fleets move onto the board,
The first turn over and some major damage done to the Von der Tann. Blue gems indicated 6 hits and reduced speed and gunnery.
Revenge is not far away. Von der Tann fires at the Inefatigable. A natural 6 and the British Battlecruiser must roll again. A 5 and the magazine explodes! First blood to the Kriegsmarine!
The German main fleet arrives on the board.

Von der Tann has taken 12 hits - indicated by the white smoke. The German cruiser fleet is on the verge of destruction and begin to crawl their way south.
And the Royal Navy battlefleet appears from the North-West.

The main battlefleets steam towards each other, but the Germans unleash salvos on the withdrawing British cruisers before they meet.
The Calliope is destroyed. 2-0 to the German High Seas Fleet.
As the main fleets pass each other the Royal Navy seems to be getting the better of the gunnery duel.
That's as far as I got before being interrupted but with 7 turns left it is still very much anyone's game. It was nice to get some ship models on the table and to have such a simple set of rules to play with. I'm not a natural naval gamer and the thought of having to bracket an enemy and then calculate specific damage to aft turret 2 makes me cringe. I do have a soft-spot for dreadnoughts (and triremes - more on that at a later date) though, and appreciate getting the chance to play an enjoyable and fast game with them.
Apologies for the amount of shiny in the photos. It is a very reflective playing surface. But I suppose the sea is a bit like that really.

Nate

Sunday, 18 September 2016

Blundering through Bohemia

Today I glued some Prussian Musketeers to their bases and thought I'd break out the whole 7 Years War collection for a game.
I rolled a d6 and a d10 and consulted One Hour Wargames for a scenario. I rolled up scenario 5, secure the bridgehead. I then rolled on the table to discover the composition of the forces. Blue - Prussia - got 3 infantry, 2 artillery and a cavalry unit. Austria - red - got 4 infantry, 1 skirmisher and an artillery. I then doubled the result for the infantry and the cavalry, and set up the table for a solo game.
The set-up has a single unit (doubled to 2 in my case) protecting the bridge of a river crossing. There is a wood to their left and a hill to their front-right. (hard to see in the bird's eye view)
In turn one the first Austrian units arrive in a random location. Both happened to appear behind the wood.
In march column they begin to head for the bridgehead.
The first Prussian reserves arrive - an artillery battery. I still have to buy some limbers.
Turn 3 and Austrian infantry arrive on the road opposite the bridge. The first Prussian infantry reinforcements arrive as well.
Turn 4 and the Austrian light troops make their way to the woods. The Austrian infantry begin to move into position.
Turn 5 the Prussian gun gets into action, and first blood goes to Alte Fritz's boys.
Reinforcements are all on the board by turn 6, and the Prussians pour across the bridge. The two Musketeer regiments engage the light troops threatening the Prussian left flank. Out of picture on the right the last Austrians start their slow advance to join the action.
Heavily outnumbered the Prussian combined grenadiers in the centre hold their ground.
The Prussian cavalry forms up, the Dragoons on the right flank, the Garde du Korps Cuirassiers in the centre. The Prussian combined grenadiers manage one last defiant volley - they have done their job! On the right the artillery and Garde Grenadiers open up to devastating effect on the Austrians.
With the Grenadiers gone the Prussian fusiliers are left in no-man's land. The Garde du Korps smash into the Austrian grenadiers and drive them back, then retire. The 18th Regiment charges into the Grenzers on the left.
Isolated well to the front of the main Prussian lines, the 47 Rohr regiment chooses to attack rather than withdraw!
On the left the Austrian grenzers defend stoutly.
On the right the Austrians get themselves into position to release some volleys.
The Dragoons move around to prepare for a charge.
All Prussian troops are now engaged. The edge of the woods has been cleared of one Grenzer regiment, but another awaits.
It only just manages to deploy and release a blast of grape, but it is too late, and the Austrian artillery is destroyed by the Rohr regiment. It happened to be just 6cm away form support - one cm too far for it to count!
On the right the Dragoons are pushed back, but the Prussian firepower continues to whittle away the Austrian attack.
The Garde du Korps charge again and the Austrian grenadiers are destroyed. The Batthyanyi Regiment has turned to face the Rohr regiment nad now has it's flank open.
The Grenzers are chased back, while the Austrian Starhemberg regiment attempts to break through the Prussian Musketeer Regiment 10 Pannewitz.
On the right volleys continue to be exchanged.
Last turn and the Starhemberg regiment breaks the Prussian 10th. But the Austrians are now spent.
As the battle ends Austrian victory remains elusive.
The 7 Years War armies are mostly Old Glory 15s, and were given to me by Geoff a few months ago. I've spent some time here and there rebasing them to fit my organisations. They were pretty much all painted - I am responsible for the light troops, a few of the cavalry and the 2 Prussian musketeer regiments that are a combination of Old Glory figures and Lancashire that I bought to make up the numbers. I have to say that I love this period for wargaming, probably more than any other horse and musket era, and it is fantastic to see the troops arrayed n the table.
The rules are adapted Neil Thomas Introduction to Wargaming rules, and have a few holes in them, which I've set about rectifying this afternoon. Mostly around morale and support, as the Ausrians really got no benefit from being very well deployed for support on their right flank. I'm also not sure about the 'super-fusiliers' that managed to be isolated and still fight like demons. Despite this, the rules gave a really pleasing outcome, and an enjoyable game. I'll complete the basing of the Prussians tonight and I look forward to another similar scenario soon.

Nate