Wednesday, 26 April 2017

With Peterborough in the Peninsula

The latest project is a skirmish campaign set in Spain, using Wargames Factory figures (now Warlord Games) and the Pikeman's Lament rules.
British infantry from River's regiment of foot (Shot with close order and first salvo)
And grenadiers from the same regiment (Forlorn Hope)
Pearce's Dragoons (Gallopers)
Spanish grenadiers of the Toledo regiment (Forlorn Hope). All of the Spanish should have belly pouches for their ammunition, but this was a conversion step too far.
Spanish foot from the Toledo Regiment (Shot with close order and first salvo)
Spanish cavalry of the Milan regiment (Trotters)
I don't know for sure that the Toledo regiment was there, and the presence of the Milan cavalry is pure conjecture, but sources for the Spanish in this war are pretty difficult to come by.


A plate with some uniform info, including the Milan regiment. The miquelets are on the painting tray now, and I have more Spanish cavalry to do for both sides.

I know I said I was only going to post battle reports, but I am enjoying this project, and want to document its progress.

Nate

Monday, 24 April 2017

The Raid part two

Continuing on from yesterday's battle report:
The Prussian Malachowski Hussars push back the Hadik Hussars to clear space for the advance to continue.

Mean while Graf von Strudel advances forward, the Starhemberg regiment deploying into line to cover the hill.

It looks like the Austrians are going to be able to prevent the the Prussians escaping with their loot.

The Prussian fusiliers march over the hill while the Hussars do their best to clear the last of Nokedli's troublesome Hungarians.

A command failure sees von Strudels brigade march further towards the bridge than planned.

The battlelines begin to draw up. Having seen of the Hungarians, the Hussars turn to join the fray.

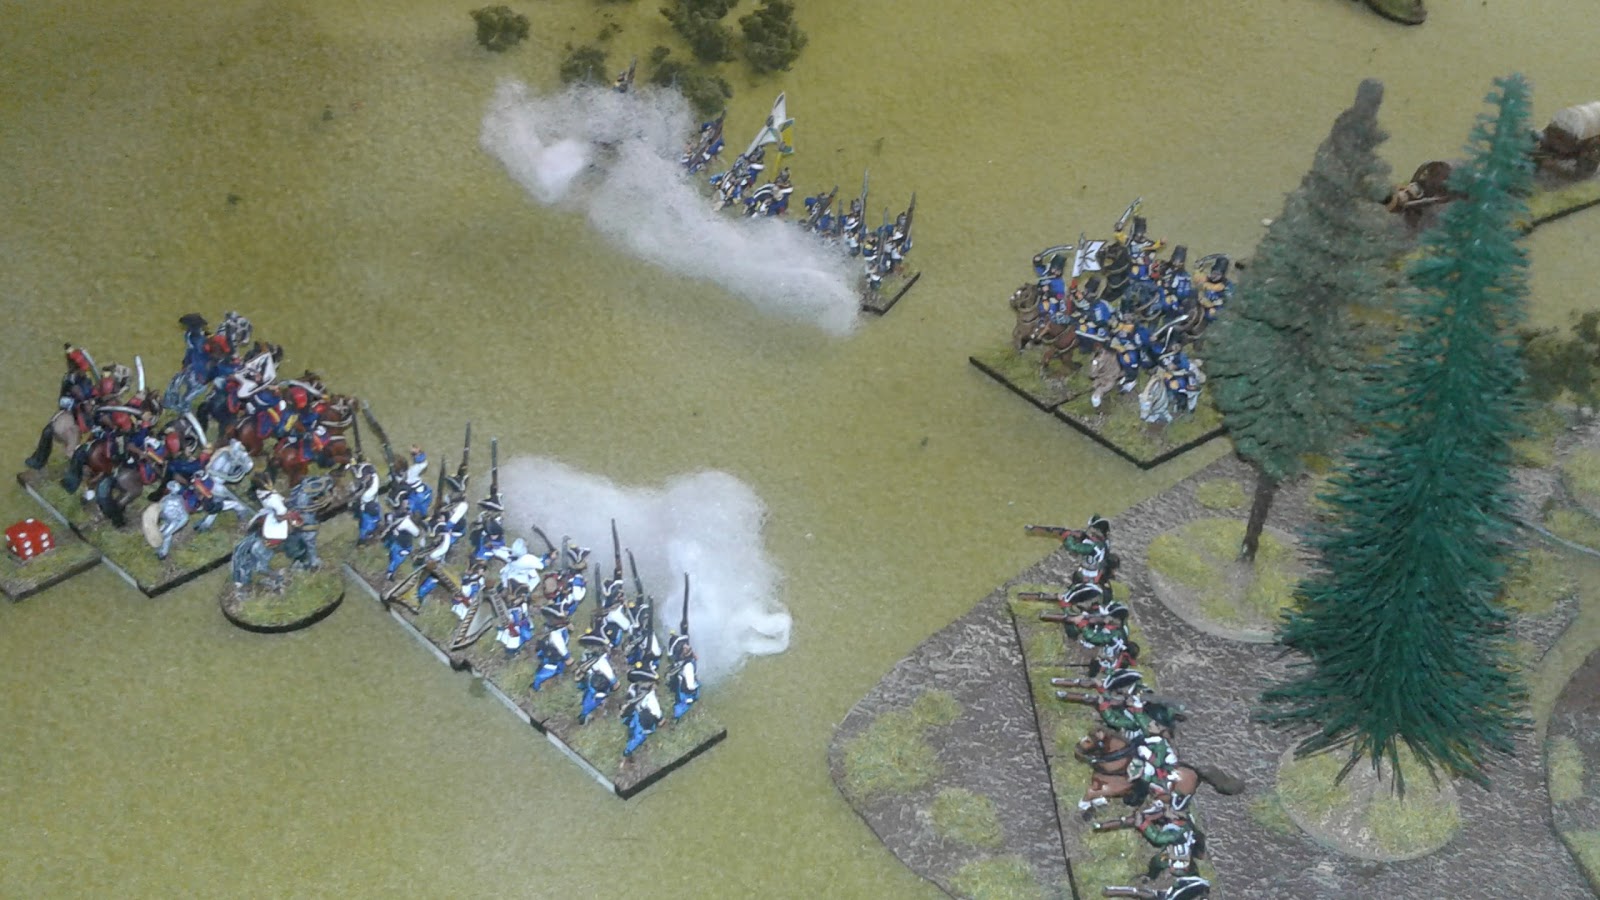
The musketry duel erupts - the Kaiser regiment has deployed too far to the north! They are enfiladed by canister from the redoubt across the river!

The Kaiser regiment breaks, but this is mirrored by the actions of the Prussian Prinz Heinrich regiment on the hill.

Hopefully in the lee of the hill the Prussians will be able to rally. The von Trumbach Freikorps reach the top of the hill and take their place.

Von Strudel chases his men, eager to rally them back to action.

Meanwhile the musketry duel continues while the Prussian Hussars get into position to mount a charge.

Von Strudel rallies the Kaiser regiment with promises of not marching them into cannon again!

And von Kasenstein manages to do the same with the Prinz Heinrich regiment!

The Prussians charge the Wallis regiment, only to lose an element and a morale test to closing fire.

Back they go to lick their wounds...

The Kaiser regiment and the Prinz Heinrich fusiliers have returned to the fray, although the Starhemberg regiment is now looking a little shaky.

Nevertheless they manage to stagger the Prussian Freikorps with their volleys.

Once more the Prussian Hussars charge

And the Wallis regiment is routed.

With the northernmost Austrian regiment out of the way, the column of loot can now cross the bridge.

The Kaiser regiment wheels slightly and begins to blast the pesky Hussars!

Miraculously von Strudel manages to rally the remnants of the Wallis regiment.

Only to see Starhemberg's men break.

The supplies begin to disappear over the bridge

To be joined by what is left of the Malachowski Hussars

'But the battle is that way!'
I played 20 turns in this game, five more than I should have, but it seemed silly to play to a deadline when there was an obvious end to the scenario in sight. The battle was tense and really could have gone either way. The command system did its job and heavily influenced the outcome of the game. First of all by making the Prussian von Kasenstein unable to change orders for a few truns he was unable to bring his superior forces to bear on the Hungarians early on. Then the Austrian 'over-advance' where the Kaiser regiment ended up deploying in canister range of the Prussian redoubts had a major effect on the game. It is unlikely that the Prussians would have been able to force their way past three full strength infantry regiments, and indeed when the Prinz Heinrich fusiliers broke it seemed that the Austrians might still pull through despite their mistake.

The Prussian artillery in the redoubts was not allowed to fire at long range - conserving powder you see, but was allowed to use grapeshot to defend the bridge.

The heroes for the Austrians were undoubtedly the Hungarian Batthanyanyi regiment that held the Prussians in place for so long and gave the Austrians a chance to win the scenario. The villain was von Strudel, whose poor command decisions allowed him to lose his advantages early on.

On the Prussian side the Fusilier regiment Rohr was steadfast in all that it did, never taking a backwards step. Von Kasenstein can expect a dressing down for his inaction before the Hungarian brigade, though.

This game was played using my heavily adapted Horse and Musket rules, based on Neil Thomas' Introduction to Wargaming. There is nothing wrong with Keith Flint's Honours of War rules - in fact I highly recommend them. But because I (re)wrote these rules, I know them well. I seldom have to look anything up. I also plan to use them for the Great Northern War and War of Spanish Succession, and I know what adaptations will be used for each period to give them their unique feel. And I've just finished rereading some interesting comments from Stuart Asquith that reinforced that one should use what rules one feels comfortable with. I've made a page for the rules now, so feel free to take a look.

' And so after quite a struggle, von Kasenstein managed to get the captured supplies back across the river. However, it will be some time before the units he took with him are ready for action again - with the exception of the Regiment Rohr, which performed prodigies in his Majesty's service. On reflection it was probably a mistake to send von Kasenstein - he is reliable but all too deliberate. This raid called for a Freikorps leader with a little more initiative. Of course, if events had transpired otherwise and Old Fritz discovered I had lost line troops under the command of a scoundrel, he would have my head. Such are the difficulties of command my love. I shall write again soon enough.

Yours
Balthasar, Graf von Pritzwalk'

Nate

Sunday, 23 April 2017

The raid

'My Dearest Wilhelmine
Having been forced to retire behind the Rotwasser I have felt that I need to keep the enemy on their toes. In keeping with this sentiment I sent General von Kasenstein on a raid of one of the enemy supply stores. He used night to head south and then in the dawn, after successfully absconding with a great deal of enemy supplies began his return journey. By early morning he was within a hand's breadth of the Rotwasser and safety...'

And so the battle is set. A raiding party of two fusilier regiments, a freikorps jager battalion and a hussar regiment are returning to their own lines accompanied by the impedimenta of their recent raid behind enemy lines. Alerted to what is happening the Austrian forces are gathering to cut the Prussians off and recover their stolen goods.

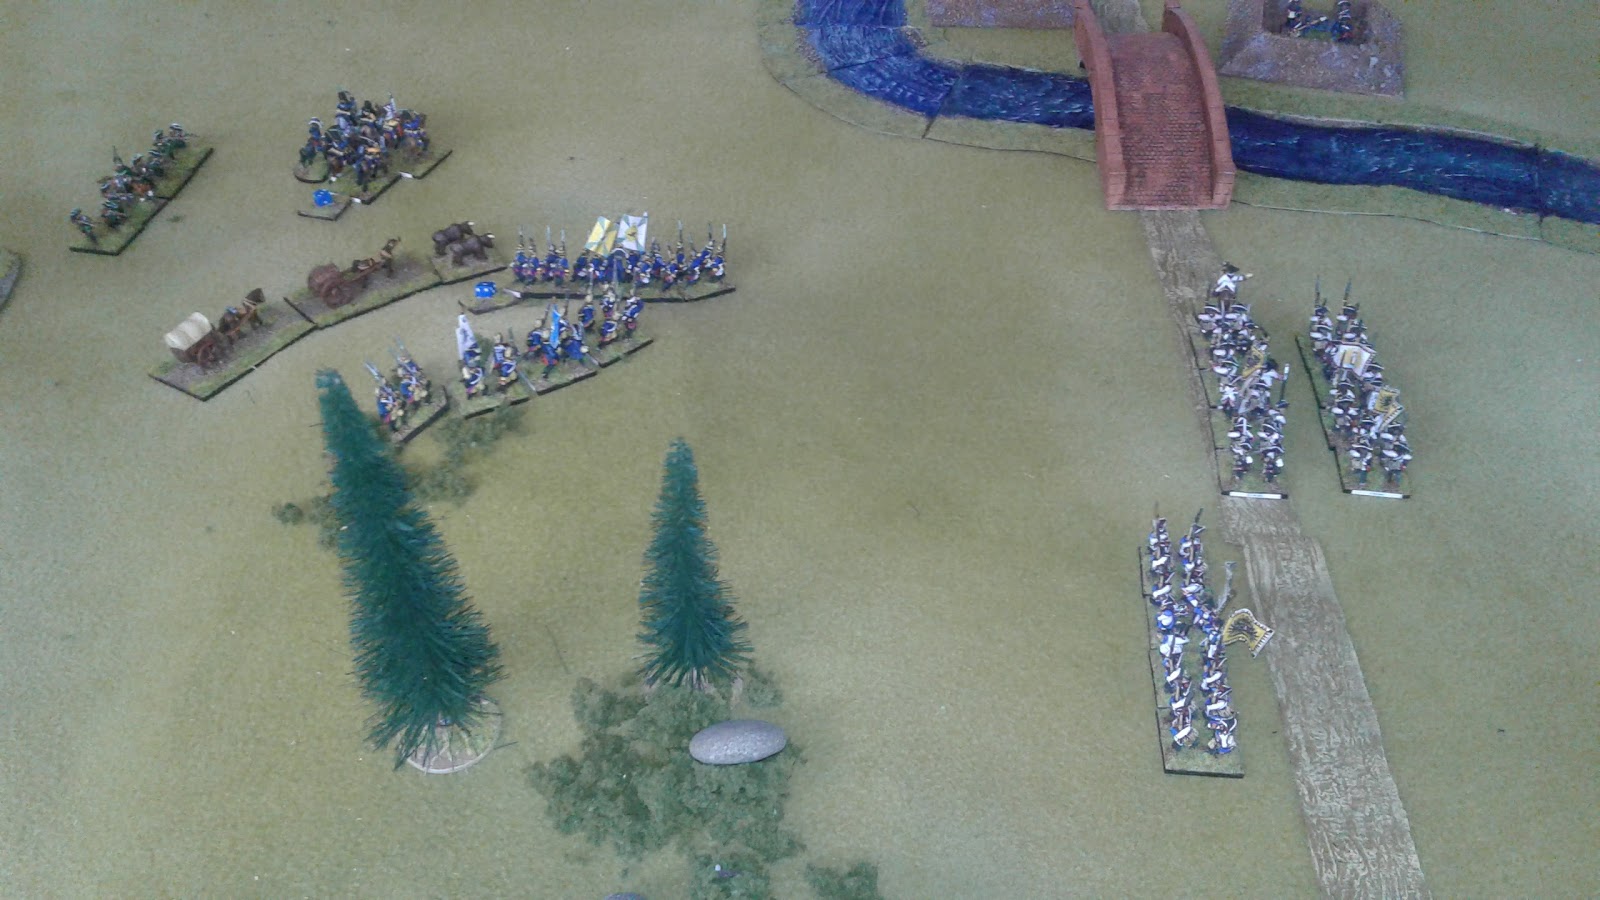
The battlefield on deployment. The returning raiding force led by Von Kasenstein are heading for the bridge over the Rotwasser in the upper right hand corner. Deployed on the hill in the centre are the Warasdiner Grenzer, standing guard. 

The regiment IR 35 Prinz Heinrich deploy to screen the column against the grenzers.

Turn two sees the Hungarian cavalry and infantry under Baron Nokedli that were stationed to the wet of the Rotwasser move south to intercept the raiding column. Their orders are to hold the column in place until reinforcement arrive to surround and defeat the Prussians.

The Prinz Heinrich regiment gets the upper hand in the musketry duel with the grenzers.

The Freikorps jager move into the woods while IR 47 Rohr moves into position to engage the Hungarians.

The grenzers begin to lose their morale.

The Hungarians move into combat with the front  of the Prussian column.

The final volley of the Prinz Heinrich fusiliers sends the Warasdiner grenz scurrying. They do not recover in this battle.

Musketry duels erupt 

The cavalry remain stationary, knowing they have little chance against steady foot supported by their opposite numbers.

As a result, the Hungarians begin to lose the musketry duel. But their excellent morale, bolstered by Baron  Nokedli, keeps them firm in the face of the odds.
An Austrian brigade under Graf von Strudel appears along the main road. Their mission is to cut the Prussians off from their escape.

Graf von strudel advances while on the other side of the hill combat rages.

Nokedli keeps his Hungarians in the combat as long as is humanly possible, but caught in a crossfire, they cannot last long.

Von Strudel continues his advance.

The infantry gone, Nokedli stakes everything on a charge by the hussars into IR 47 Rohr. But this Prussian regiment has barely begun to feel the effects of combat and with its supreme confidence after having routed the Hungarian infantry, it sees off the hussars in peremptory fashion.

And so the Prussians are ready to deliver the coups de grace to the Hungarians and head towards the bridge. But is it too late? Have the Hungarians done their job and delayed the Prussians just long enough to allow the Graf von Strudel to win the day?
Stay tuned...

Nate

Wednesday, 19 April 2017

All quiet on the southern front

The blog has been somewhat inactive in the past month, and one could be forgiven for believing I have fallen off the face of the wargaming world. Nothing could be farther from the truth, but what the silence does indicate is a lack of gaming. Earlier this year I decided that in an effort to keep the blog tidy and make me focus on the gaming side of my hobby more, I would only post battle reports on the blog. So no painting updates and no navel gazing (surely in a wargaming blog that should be naval?).  With John in the process of extensive renovations and my games table covered in bits and bobs a gaming space has been hard to come by, and as regards time, I have been using it to build and paint. However, I feel the urge to write an update and get some decent navel gazing in, as I have embarked on a series of new and exciting projects in the past couple of months.

First of all, the painting:
Spanish Marlburians..
Their British opponents (and sheep in the background...)
Some of the painting that I've done for Craig.
A close up of some of the WWI tanks I've painted for him
A whole paratrooper company along with an SS company and other assorted Flames of War painting have come to their conclusion, and so today I received the next batch of German grenadiers to start on. Not that I'm complaining, as this, as always, is funding my own projects.

So what's he working on now then?

The release of the Pikeman's Lament rules has been a filip to my wargaming ambitions. At first I decided that I would do the Thirty Years War and invest in a battalia box from Warlord Games, which would give me virtually everything that I needed. But while that package was going AWOL I came to the conclusion that there is no reason that these rules wouldn't work wonderfully well for the Wargames Factory Marlburian figures I had lying around. Having bought Nick Dorrell's book on the Allied armies operating in Spain, I decided to concentrate on this theatre as the background to the project. Then I began reading about Peterborough's campaigns. Needless to say I am hooked. Currently I'm halfway through building companies for the Allied and Bourbon forces.

The other thing that Pikeman's Lament stirred in my imagination was that they would be eminently suitable, with very little adaptation, to the second, and rather more famous, Peninsular War. So add a box of Victrix French and a box of Perry British, and that plastic mountain just continues to grow. It therefore means that I have three skirmish scale projects under development all using the same basic rules. Even better, PL is so much like Lion Rampant, that the same rules system is also my go-to for Gallic Wars skirmish. Although I have decided to start calling Eagle Rampant, 'Caesar Rampant', due to the Napoleonic version of Lion Rampant having the same name. And just to maximise the utility of the rules, I also have three boxes of plastic Gripping Beast Dark Ages on their way to be kitted out for the same games system.

On top of this I also have ordered some  Black Hat 15mm Marlburian armies to be used with the Honours of War rules, meaning that these will now form the basis for my Seven Years War, Great Northern War and, (now) Spanish Succession gaming.

Just when I was thinking this seemed like a lot to deal with, Mike announced his intention of playing Team Yankee, Battlefront's World War Three game. A couple of quick messages and my Great War Flames of War were swapped with Craig for his Cold War Soviets and the beginning of a West German army too. 

And as my butterfly like mind refused to settle anywhere for more than  few seconds, a final project has begun to develop in my mind. This is to get hold of some of the Irregular Miniatures 42mm toy soldiers and paint them up in gloss varnish, using dead simple HG Wells/Young and Lawford/Featherstone/Grant style rules. My mind is thinking of British and Germans in the 1890s. Guards in Bearskins, line infantry in home service helmets, Life Guards in crested helms taking on uhlans and pickelhaubed hordes. The sort of thing that would happily grace a nursery floor at the end of the Victorian period.
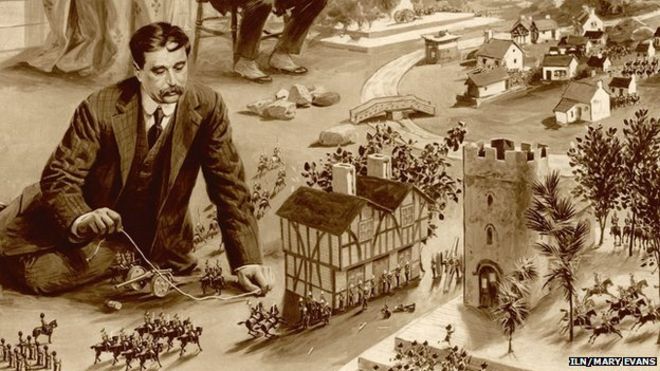
Image result for HG Wells, little wars
Will this new endeavour require the growth of a moustache?
So stay tuned, a lot of new projects on the horizon.

And hopefully some gaming. Which will mean blog posts.

Nate