As per the previous post, everything was set up for a conflict between the two rival forces operating along the El Boa river in Spain. The sides consisted of the following:
The Bourbon Allies:
French Brigade: Auvergne and Orleans infantry regiments along with 1 gun, and the La Reine Cavalry regiment operating independently.
Spanish Brigade: The Sevilla and Burgos Tercios with 1 gun and the Mahoney Dragoons and a militia unit of paisanos operating independently.
The Autricista Confederates:
Infantry Brigade: Starhemberg's regiment, Rivers' Regiment and St Amant's Regiment, along with 1 British gun. Independent to this Brigade were the Killigrew's Dragoons, Zinzendorf's dragoons and a unit of Miquelets.
The scenario was simple. The Confederates had to make sure that the Bourbons didn't cross the El Boa. If they couldn't prevent this from happening they were to evacuate their baggage from the village of Sullaro from turn 4 onwards. Included in the Baggage was the British Gerneral the Earl of Rottenborough's mistress. The stakes were high!
Turn One: With the artillery firing the Bourbons began their advance.
 |
| Both Allied brigades moved up to the banks of the El Boa |
 |
| The artillery began to do some damage to Rivers' Regiment |
 |
| French artillery firing in support of the advance |
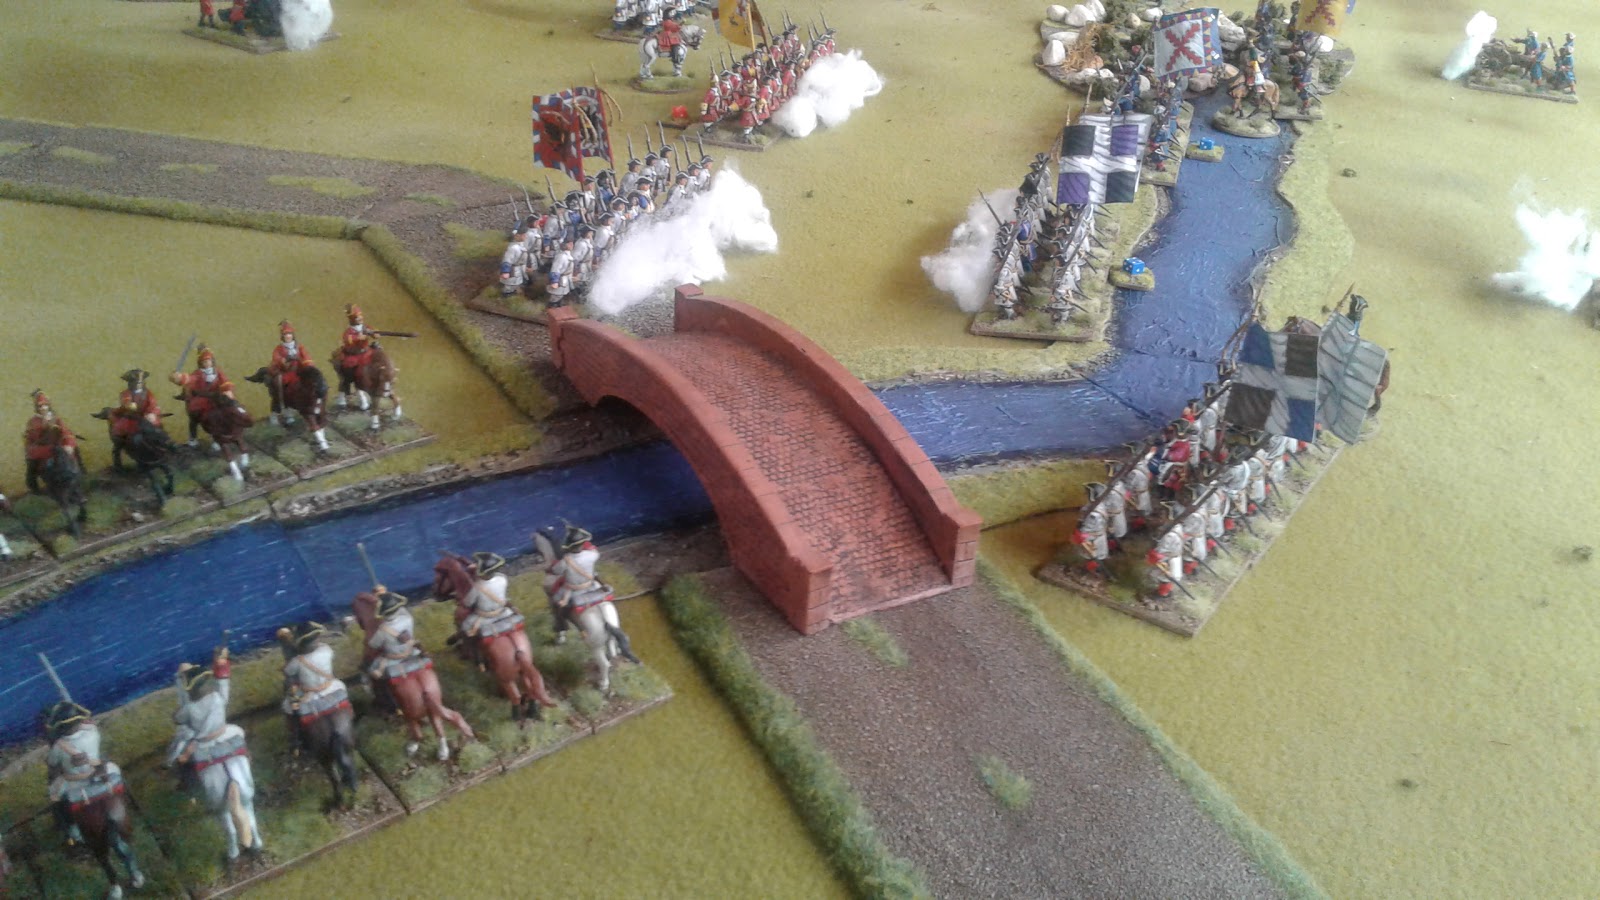
Turn 2: The cavalry began to move for the open areas on either flank, while both Allied infantry Brigades advanced one regiment forward in oblique attacks that concentrated in the centre.
 |
| Zinzendorf's Regiment line the bank of the El Boa |
 |
| Starhembergs' Regiment opposes the Auvergne regiment as it begins to ford the river. |
This is where I added a rule. It seemed wrong that in the middle of the crossing of a river a regiment should be able to fire with near full effect (they had a -1 to their firing for moving their full move). So I decided that any formed unit in difficult terrain should only fire and melee with half dice. I had a quick look through the rules, but I couldn't find a negative modifier like this.
Turn 3:
 |
| The leading regiments are struggling out of the river, but Auvergne has taken 4 hits and now counts as weakened. The Old Purples are crossing the swampy difficult ground where the river ends. |
 |
| Starehmberg's men continue to poor volleys into the hapless French, whose return fire is rather ineffectual due to being in a weakened state. |
 |
| On the far flank the Miquelets and Paisanos are engaged in skirmishing in the woods, neither side able to get the upper hand - all battle! |
 |
| Meanwhile at the other end of the battlefield, the La Reine regiment lines up against the Zinzendorf's. Who will dare to charge across the river? |
Turn 4:
 |
| The Auvergne regiment has had enough - they have the dubious distinction of being the first unit to rout in the game. |
 |
| Killigrew's Dragoons charge Mahoney's Dragoons on one side of the field... |
 |
| While The La Reine takes the plunge at the opposite end. |
In this turn the wagons started moving. The cavalry combats were indecisive, neither side able to overwhelm the other and both retreating 3".
Turn 5:
 |
| With the Auvergne Regiment gone theOrleans boys step up with a massive volley, ably supported by the French artillery. |
 |
| Both cavalry units are weakened after a second round of combat. Nothing for it but to withdraw and try to rally. |
 |
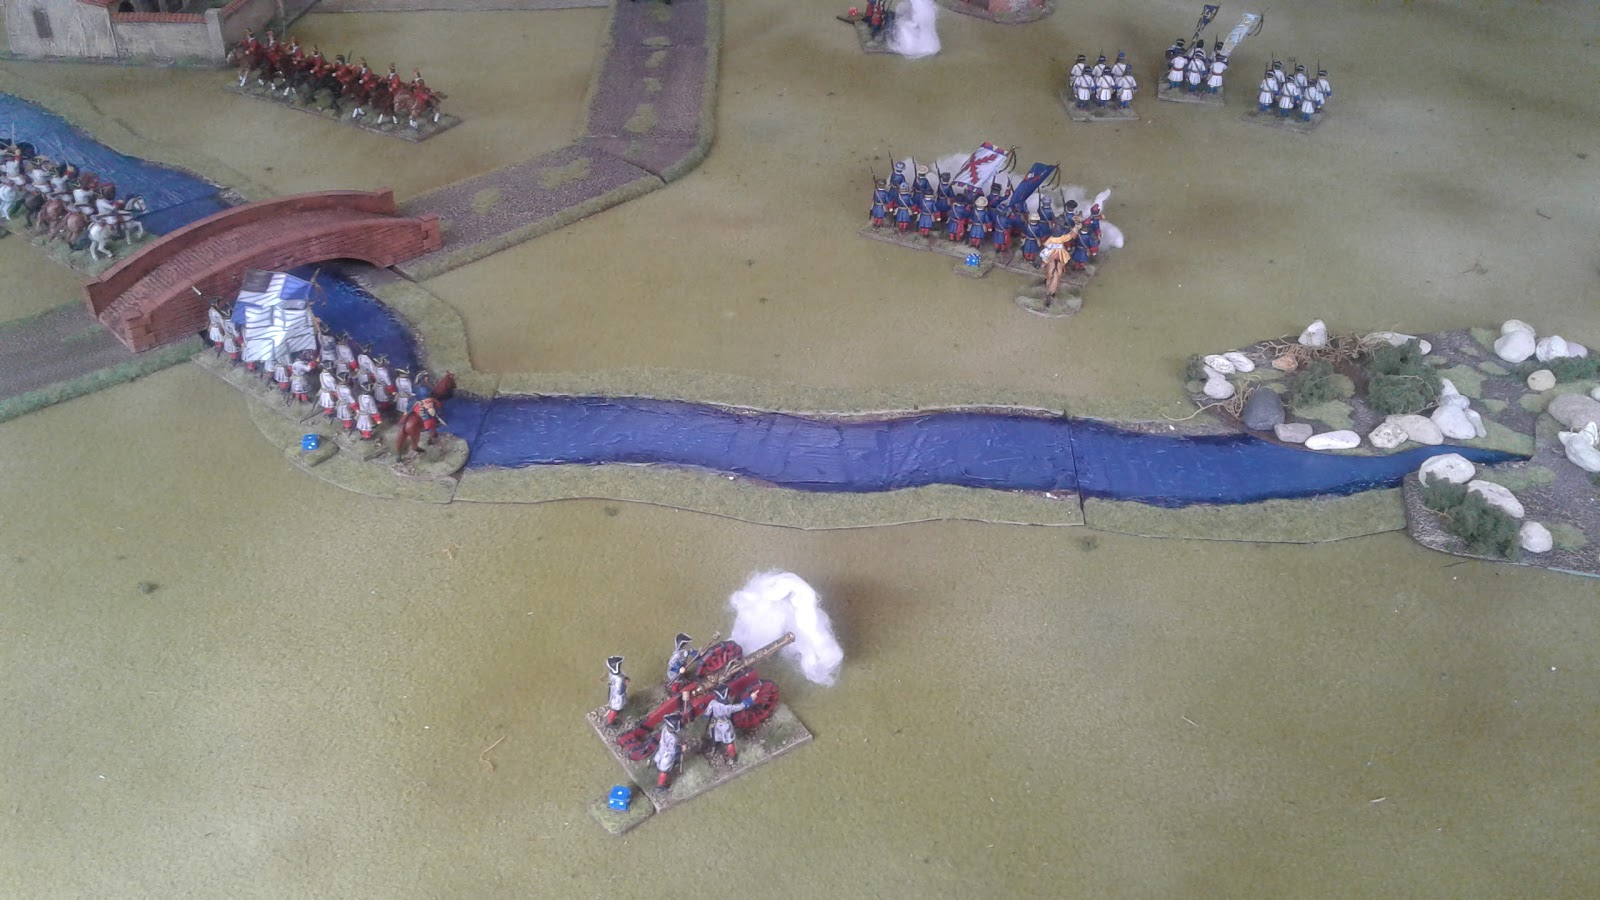
| In the centre the Burgos Tercio charges Rivers' Regiment and sends it scurrying. St Amant's Regiment tries to cover their rout. |
 |
| General Rottenborough tries to rally Killigrew's men. |
 |
| Another view of the Spaniards chasing away the English... |
 |
| There goes another cart. |
Turn 6:
 |
| St Amant's Regiment poor a final volley into the Old Purples, who, exhausted after wading through difficult terrain , have had enough. |
 |
| But Starhemberg's men are also in the same boat. Having seen of the Auvergen regiment they just don't have enough left in them to defeat the fresh Orleans regiment as well. They withdraw, but the French cannon turns this into a rout. |
Turn 7:
 |
| And then the Burgos Tercio does the same thing to the St Amant regiment |
 |
| The Killigrew Dragoons have rallied and attempt to cover the withdrawal of the Confederate army, but as the target of all the Allied artillery, they are weakened again. |
 |
| The Orleans Regiment advances across the El Boa to join the Burgos Tercio in the final advance. |
 |
| At the end of turn of turn 7 the Allies have secured the field, although Sullaro has been totally evacuated. |
Once again this was a quick game. Just over an hour to play, and with moments that hung in the balance. There was some abysmal dice rolling by some units (I'm looking at you Miquelets!), and some heroic stands as well. Mahoney's Dragoons - inferior to Killigrew's who are basically full cavalry units, managed to roll all it needed to stay in the game and push their opponents back. Zinzendorf's dragoons, faced with the same situation on the other flank managed to use the river bank defensively to good advantage.
In all it was a draw. The Allies forced the river while the Confederates managed to evacuate Sullaro just in time. Lord Rottenborough may have lost his centre, but he kept his mistress.
I really enjoy the Post of Honour rules. Units have greater survivability than in Honours of War, everything is intuitive and reference to the rules is kept to a minimum. I haven't found anywhere that I need to alter them for the Marlburian period. It will be interesting to see when I have more cavalry painted and I'm able to use them as a Brigade with their own general, how tactics will evolve as reserves and tactical withdrawals behind friends in order to rally become more important.
Nate


Not easy to cross a river! Sounds like a beautiful and tight game, nice report Nate!
ReplyDeleteMerci Phil. C'était un bon jeu.
DeleteGood looking game! What are the differences in unit survivability between PoH and HoW?
ReplyDeleteThanks Jonathan. Maybe there aren't any - you're much better with probability stats than I am, it might just be the speed of the game makes things feel more survivable? A unit can take 4 hits before it is weakened and is routed on 7, but the odds of inflicting more casualties in the first place are greater. I guess it depends on rolling to a certain extent.
DeleteThank you for bringing the Post of Honour rules to my attention. These days I've tended to shy away from rules running more than 3 or 4 pages, but these are so clearly written and straight-forward that my creaky 68-year-old brain should be able to handle them!
ReplyDeleteBest regards,
Chris Johnson
They really are very good. There's still some areas that could be tweaked - like I did with shooting while crossing the river, but that is what playtesting is for!
DeleteWhat a lovely looking game and your figures look great. I'm sticking with HoW for the present but may give these a go at some point.
ReplyDeleteThanks Steve. HoW are a little more well thought out regarding national characteristics etc, but I find Post of Honour flows really nicely. It is well worth a go.
DeleteGreat looking game Nathan. The set up is vaguely reminiscent of the Blasthof Bridge game from the Young and Lawford book “Charge: or How to Okay Wargames”.
ReplyDeleteYes, there are definitely some similarities. Blasthof Bridge is on the 'to do' list, although it will probably be called Puente Blastella!
Delete